Friday, August 29, 2008

SQL Server Bulk Insert Using a Format File to Read Data that also Includes a Comma in the String

There are a lot of resources out there on the net about using SQL Server Bulk Insert, and there are a lot of technical discussions about the inner details of Format Files. The problem is that there aren't many concrete examples of a very common need: importing a CSV (comma-separated) file where a quoted string also includes a comma. Here's an example of what some data might look like:
ID,Name,Phone 
100983,"Jones, Frank",555-1212
118928,"Smith, Joe",555-1313
115454,"Franklin, Alibaster",555-1414
Using a bulk insert statment without a format file would give us data that would look like this:
IDNamePhone
100983"JonesFrank"555-1212
118928"SmithJoe"555-1313
115454"FranklinAlibaster"555-1414
When in reality, we want the data to look like this:
100983Jones, Frank555-1212
118928Smith, Joe555-1313
115454Franklin, Alibaster555-1414

Thursday, July 10, 2008

WebLogic Case Sensitivity

Prior to v9.0, Weblogic was case-insensitive in Windows, but starting with v9, the default is, like Apache, to be case sensitive. A web search on changing that behavior isn't very helpful, and the setting is buried a bit, so I thought I'd post the instructions on changing that setting. The first step is to run the weblogic admin console. The default URL, once that has been started, is to browse to http://servername:9999/console. You'll be prompted for the username/password that you configured when installing weblogic. Once there, click on Domain-> Security-> Advanced. There you will see a "Web App Files Case Insensitive:" setting. By default, this is set to "false". Change it to "os", click on save. Once it's been saved, the changes have to be Activated. Click on the green Activate Changes button on the left-hand side of the screen.

You'll have to reboot the admin console, as well as your standard weblogic web services, for this change to take effect.

Tuesday, June 17, 2008

Persistent Problem with MS Update

Have you ever gotten a Windows system that simply won't update? That is, it'll find all the updates it needs from Microsoft, but the updates won't do anything but fail. It's a bummer, because the normal reboot simply won't fix the problem. It turns out there is a solution. The problem appears to come from XP SP3, beauty, that. In any case, this should fix the problem: Run: REGSVR32 WUAPI.DLL REGSVR32 WUAUENG1.DLL REGSVR32 ATL.DLL REGSVR32 WUPS2.DLL REGSVR32 WUCLTUI.DLL REGSVR32 WUPS.DLL REGSVR32 WUWEB.DLL REGSVR32 WUAUENG.DLL

Windows Vista Look and Feel in XP

If you're interested in making your XP system look like Vista, there are a ton of resources out there. Why another one? Because I want to keep it simple. I found two resources that gave me the whiz-bang look and functionality without fiddling too much with lots of other apps. In short, I used what must be the gold standard, Vista Transformation Pack, along with TrueTransparency and the Microsoft Zune XP theme. With these three packages, I got more than I needed, and they're all free. I ended up unselecting the toolbar and start button transformations from the vista transformation pack; I don't care for the tool bar, and the Start Button just wasn't quite where I think it should be: you can't right-click on the icons, and there's just a bit missing. Still, it makes for a great user experience, without a lot of the Vista negatives.

Wednesday, June 11, 2008

Desktop Search for Windows x64

Windows released version 4 of its desktop search recently, and I must say that it (mostly) works well. With the Vista desktop, one simply can begin typing a search string at the start menu, and Windows will present the search results there as you type.

The problem: UNC indexing isn't apparently supported in the 64 bit environments, at least not with Server 2008, and the network shares I want to index are stored on Windows Server 2000 boxes: those won't run the new indexing tool.

So what to do?

Tuesday, April 22, 2008

PeopleSoft Upgrade Woes

When upgrading a PeopleSoft database from 8.47 to 8.49, we ran into a curious problem, receiving this error:
SQL Error. Error Position: 14 Return: 6550 - ORA-06550: line 1, column 15: PLS-00103: Encountered the symbol "TABLE" when expecting one of the following: := . ( @ % ;
It turns out that it was a simple problem, but it wasn't at all obvious from the error: the DDLORA.DMS script that ran during the initial part of the upgrade was old; for whatever reason, it hadn't gotten updated by the install process. This is what was happening: Datamover was importing the tables, and the first succeeded. Then: it went to compute statistics. That's where things went wrong. Here's why: the ddlora.dms script defines not only default tablespace parameters, but also the method by which DataMover will compute statistics. Pre-8.48 PeopleSoft did it using the 'analyze table' method, while 8.49 uses the dbms stats method. With the old statistics parameters in the PSDDLMODEL table, the compute stats call failed, and so did the upgrade.

To fix this problem, we installed PeopleTools 8.49 again on an empty PS Home, and then we copied the new script over.

Tuesday, April 15, 2008

404 (Not Found) Error When clicking on MySite "My Profile" tab in SharePoint

This error is vexing, though there's a simple solution documented in MS kb924399. I've summarized the solution below with some assumptions about settings that folks normally use. In short, the problem is that there isn't a site collection set up using the appropriate template in the MySite web application. We'll correct that in a few steps. Note: it's entirely possible--even likely--that you've already got a site collection created at the root of the mysite web application. If this is a single personal site, that's part of your problem. This site will need to be backed up and deleted before you can go further, assuming that all of your other personal sites are using a different path. First, we need to create the managed path that SharePoint will use for this site collection.

This can be anything, but most people will have created their sites with the default root ( / ) site collection. So we'll go with that for our purposes.

To do this, click on Application Mangement -> Define Managed Paths. Make sure, once the defined managed paths screen comes up, that you've got the correct MySite web application selected in the top-right. Go ahead and create the managed path at the desired location.

Next, we'll want to create the site collection using the correct template.

Click on Application Management -> Create Site Collection to bring up the site collection screen. Make sure you've got the correct web application selected on the left, and then select the managed path you created in the step above for the URL.

Give the site collection a title, like 'Personal Sites', and -- here's the money part -- select the "My Site Host" template from the Enterprise template tab.

Fill in the site administrators fields appropriately and click on OK.

After doing these steps, the My Profile tab should work again.

Thursday, April 10, 2008

Simplifying SharePoint Structure with Site Collections

Site Collections in SharePoint 2007 are the "pieces" of a web application. Personal sites (my site), for instance, are each a site collection. There are a couple of real benefits, too, for using many site collections--instead of multiple web applications--to form the bulk of your SharePoint implementation. SharePoint Maintenance On the whole, it's simpler to have few IIS web sites (and few web applications) and many site collections. This provides for fewer urls (and thus fewer IIS sites) and fewer ACLs (permissions) to maintain. The permissions piece, in particular, can become a real bear in a large SharePoint installation, as each piece of a web application and all of the pieces of all of its site collections can all have different permissions assigned to them. Using site collections as the primary content-delivery piece can simplify the permissions considerably. Backups/Restore Backups in SharePoint are a tricky business, partly because Microsoft gives you many ways to perform backups and recovery. The simplest solution for backing up your SharePoint installation is to do a farm-level backup, which gives you the option of restoring individual web applications. The downside to using lots of web applications, as most SharePoint administrators quickly discover, is that you end up with a multitude of IIS web sites. To create subdirectories within these sites, administrators create site collections within them, giving a pretty complex structure. Moreover, when you perform a web application backup, you have to restore the web application, which includes all of the site collections contained within it. That complicates the restore process quite a bit. Some implementations (particularly very large SharePoint sites) will benefit from the above scenario, but most people can get all the functionality and simpler administration by using site collections as the primary structural unit. Because you can backup and restore individual site collections, it allows you a lot more flexibility and granularity in your backup and restore strategy. Moreover, it happens from time to time that a web application configuration become corrupt, such that, for instance, the my sites functionality no longer works. If you have backed up the individual site collections from that web application, it is a trivial task to create a new web application and import the component site collections into it. Backing up site collections, however, does bring up a problem: because stsadm (the admin tool used to backup site collections) requires a site collection url as a command line parameter, there's not an out-of-the-box way to backup all site collections in one fell swoop. Happily, this problem has been recognized by many competent scripting folks. The script we use is a modified version of the one posted by Mauro Cardarelli on his blog. It runs through all of the site collections in a given url and backs them all up individually. Note that, should you use this script, it was written for SharePoint 2003, and as a result, the path to the stsadm executable needs to be updated from C:\Program Files\Common Files\Microsoft Shared\web server extensions\60\BIN\stsadm to C:\Program Files\Common Files\Microsoft Shared\web server extensions\12\BIN\stsadm.

Friday, March 28, 2008

401 Error when trying to create MySite (personal site) in SharePoint 2007

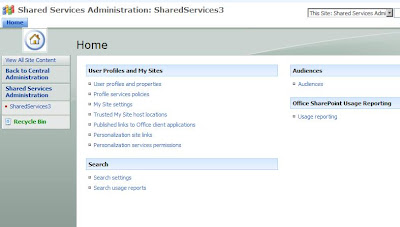
It's a common enough problem that you can find untold numbers of questions posted to forums and blogs: why am I getting a 401 denied error when trying to get to/create a mysite personal site in SharePoint? The problem usually is manifest by first being presented with a username/password prompt three times, followed by a 401 error. Interestingly, in Firefox, it appears that sometimes you just get unending username/password prompts. Why this is happening: who knows? It's often possible to track down the problem, usually related to application pool permissions or some rogue setting in SharePoint. Even if you do find the problem, though, enough settings in SharePoint are reasonably inaccessible after the initial setup that finding your way to correcting it can take a very, very long, frustrating time. Our solution has been simply to create a new default shared services provider (SSP) and associate all of the web applications, including the existing mysites, to the new SSP. The Shared Services Provider in SharePoint is the glue that holds everything together. It manages, in particular, what happens when you click on the "mysite" link. So when that link no longer functions properly, one way to fix it is to set up a new SSP using a new content database and new IIS web site. In this way, we can eliminate a lot of errors without having to do a lot of painful troubleshooting. We'll go through those steps now. Note that these steps are for SharePoint 2007; they may work on 2003 as well, but I've no experience with it, so I make no promises as to its applicability. Create the New Shared Services Provider Open SharePoint Central Administration and click on the Shared Services Administration link on the left-hand side of the screen. You should see something like the screen shot below. To create a new Shared Services Provider, click on the New SSP link. You'll want to create a new web application to host this, on a new port. Also, specify a new SSP Database, ensuring that any erroneous settings don't get migrated. Make sure that you use your existing MySite web application (in this example, named "Sharepoint - Personal") for the My Site Location in setting up this new SSP. Once you've created your new SSP, you can set it as the default (using the Change Default SSP link). Once you've done that, use the Change Associations link to associate all of your existing web applications to the new SSP. Having done that, you're probably good to go. You might, just to be safe, double-check your My Site settings in the new Shared Services site. Check your My Site Settings On the left-hand menu, under Shared Services Administration, click on the title of your new SSP. This will open the SSP home page, like below. Click on the My Site Settings link and make sure that the Personal Site Location field matches what you had set up previously. Having done that, you're done! Delete any erroneously-created My Sites Unless you're not: if you discover later that the personal site location field is incorrect, you may end up with users creating new sites when they already had one. This is disconcerting, but it's easily fixed. To delete a user's My Site, simply click on the Delete Site Collection link in the Application Tab of the Central Administration page. There you can select the offending site collection from the My Site web application. This will delete the My Site without problem. However, you still need to change the My Site settings in the SSP, as above. And: having done so, issue a iisreset /noforce on the front-end web servers. Unless you do this, the user runs the risk of being directed, even still, to the now-nonexistent My Site. This gives them a 404 (not found) error. After the iisreset, they should be directed, again, to their original my site.

Wednesday, March 26, 2008

Value cannot be null error When Trying to View a SharePoint Site

We ran into a problem after restoring a SharePoint 2007 farm that stumped us for awhile. Namely, the MySites web application wouldn't come up; it had restored successfully, but we'd get a generic error message when we'd try to browse to it. Once we had turned on detailed error reporting, we saw the following error code:
Value cannot be null. Parameter name: serverContext at Microsoft.Office.Server.UserProfiles.UserProfileManager..ctor(ServerContext serverContext, Boolean IgnoreUserPrivacy, Boolean backwardCompatible) at Microsoft.Office.Server.UserProfiles.UserProfileManager..ctor(ServerContext serverContext, Boolean IgnoreUserPrivacy) at Microsoft.Office.Server.UserProfiles.ProfileLoader.EnsureUserProfile() at Microsoft.Office.Server.UserProfiles.ProfileLoader.GetUserProfile() at Microsoft.SharePoint.Portal.WebControls.CreatePersonalSpace.Page_Load(Object sender, EventArgs args) at System.Web.Util.CalliHelper.EventArgFunctionCaller(IntPtr fp, Object o, Object t, EventArgs e) at System.Web.Util.CalliEventHandlerDelegateProxy.Callback(Object sender, EventArgs e) at System.Web.UI.Control.OnLoad(EventArgs e) at Microsoft.SharePoint.Portal.PageBase.OnLoad(EventArgs e) at System.Web.UI.Control.LoadRecursive() at System.Web.UI.Page.ProcessRequestMain(Boolean includeStagesBeforeAsyncPoint,Boolean includeStagesAfterAsyncPoint)
Now this made no sense whatsoever; what's null? The application looked like it was set up correctly, and it had been working before we did the backup and restore (it was a test run of our DR process). Unfortunately, too, all I could find on the web that referenced the error was information about coding tasks, which isn't what I'm doing at all. Finally, we fixed it: Alternate Access Mappings. We were using SSL to access the site (through a netscaler load balancer), but post-restore, SharePoint only had http:// in its configuration. After re-adding https:// as a public URL for the web application, the error goes away.

Configuring SharePoint 2007 to Display Errors

By default (and this is a good thing), SharePoint displays a simple generic "an error has occurred" message when a problem arises. In troubleshooting these problems, it's useful to turn on more descriptive error messages. The first thing to realize in any discussion of detailed error messages on the web is that it's generally not a good thing to keep your site configured to display details of the errors that are generated; it can reveal much about your infrastructure and security that is best kept secret. So: when you make these changes, be sure to unmake them later. Locating Web.config Configuring SharePoint to display a details (including a stack trace) of its errors involves two simple changes to the web.config file that is stored in the root of the affected web site. Hopefully, in setting SharePoint up, you opted to use meaningful names for the web sites. If, however, that didn't happen, call up the Web Application List in SharePoint's application management tab. You'll see a list of the sites (name) and their respective URLs. Those names correspond to the site names in IIS. Of course, SharePoint doesn't care where that document root is, so if you don't already know where the document root is, open up IIS manager and view the web site's properties. Click on the Home Directory tab, and you'll see the path to use. web.config will be in that directory. Modifying Web.config Having located web.config, open it in a text editor, and find the following line:
<customerrors mode="on" />
Change the above setting to Off. This tells the web app server to display errors as they occur, instead of the generic SharePoint-defined custom error of "An Error occurred." Likewise, find
<SafeMode MaxControls="200" Callstack="false"
Change the false above to true. This tells the web app server to display the error stack when an error occurs. When you save your changes, you should be set, and your SharePoint errors now will display as they occur.

Tuesday, March 25, 2008

Backing up and Restoring SharePoint 2007 Sites and Site Collections

Restoring SharePoint 2007 sites and web applications from a backup can be quite a headache; SharePoint is famously tight-lipped when it comes to error messages. This is a rundown of some of the issues we've run into in restoring from backups.

--

Restore Errors

DCOM Permissions


If your restore fails with a log referencing "UnauthorizedAccessException" referencing a COM class with a long CLSID and error number 80070005, you've got a COM Config permissions problem. This error is accompanied by a system event log like the one below.


The application-specific permission settings do not grant Local Activation permission for the COM Server application with CLSID
{3D42CCB1-4665-4620-92A3-478F47389230}
to the user domain\databaseconnectuser SID (S-1-5-21-2142909598-1293495619-134157935-85307). This security permission can be modified using the Component Services administrative tool.


As the event log error indicates, the fix for this is to use the Component Services tool (dcomcnfg.exe) to give Local Activation permissions to the user listed. Here's the rub: you don't at this time know which COM class to modify. To figure that out, search in the registry for the CLSID as referenced in the event log and restore log.


The registry search will give you the name of the com class. Unless it doesn't: a common class to have this problem is OSearch. If, when you search the registry, you see "Microsoft Office SharePoint Server Search Gathering Manger", the name you'll look for in the component services tool is OSearch.

By the way, you're looking in the DCOM Config tree in Component Services, as in this screen shot.

Right-click on the appropriate class and select Properties. Then click on the Security tab and edit the Launch and Activation Permissions.

Add the user that is mentioned in the event log, and give that user local launch and local activation permissions.

Finally, restart IIS with a iisreset /noforce. That should take care of this error.


Web Site Is In Use Restore Error

Especially if you've set up multiple SharePoint sites using host headers and SSL, you'll likely end up with the following error when trying to restore the web application:

ArgumentException: The IIS Web Site you have selected is in use by SharePoint.
You must select another port or hostname.

The issue is that SharePoint, in restoring the IIS sites, doesn't restore the host headers, as well. Hard to figure out why, but there you have it. Moreover, this error isn't a IIS error, which is to say that, even if you fix the alleged conflict, SharePoint still will error out on the restore, because it still thinks there's a problem.

So you have to do one of two things: customize the settings when you restore the web applications (to use different port numbers), or restore them one at a time, configuring each after the individual restore to use host headers. In either case, to end up with the original URLs, you'll have to do some fiddling after the restore is complete.

In short: you want to restore the web applications, such that you've got the content back. Having done that, you can re-create the web sites, using the Extend an existing Web application component of SharePoint's Application Management.

Extend the newly-restored web application to a new IIS web site, using the appropriate port number and URL. Once you've extended it, you can go back and "Remove SharePoint from IIS Web site." Using the remove function, you can delete the unwanted site, leaving only the desired URL.



Sunday, March 16, 2008

Rebuilding RPMs in RHEL

How to rebuild a RPM from source Reconfiguring and rebuilding RPMs can be immensely useful, particularly when, as in the case of AMANDA backup software, you need to make a change that is used over and over again on a lot of clients. The steps are pretty straightforward. In short: To tweak an existing package
rpm -i .src.rpm
This puts all sources into /usr/src/redhat/SOURCES/ and the .spec file into /usr/src/redhat/SPECS/ which you can change as required To change the compile settings Edit the /usr/src/redhat/SPECS/.spec file to meet your needs To build the binary Then run the following command to build the RPM:
rpm -bs /usr/src/redhat/SPECS/.spec
rebuilds the RPM from the modified source. -- How to rebuild the AMANDA source to create new install RPMs This is an important thing to do: AMANDA by default picks random high tcp ports on which to communicate with the clients. This is a problem when we cross subnets, in particular, since the firewall needs to know which ports are needed. So we recompile the source to include the --withtcpportrange= and --withudpportrange= switches. This will limit AMANDA to the appropriate port ranges. This is from http://wiki.centos.org/HowTos/AmandaBackups 1. Download the amanda-xxxxx.src.rpm file. 2. Install the source rpm: rpm -i amanda-2xxxxx.src.rpm. This will extract the contents into your rpm directory (if you're doing it as root, it'll be /usr/src/redhat/.) 3. Edit the SPECS/amanda.spec file to reflect the appropriate changes. It's a good idea to changed the Release: tag to indicate you've made changes. In addition to just helping you keep track of what you've changed from the default, this will help keep the package from being updated automatically when you patch the system. To set up AMANDA to use specific ports that we can open up on the firewall, we want to add the following to the ./configure command. Don't forget to put the trailing back-slashes at the end of the lines.
--with-tcpportrange=50000,50100 \ --with-udpportrange=700,710
4. Rebuild the rpms:
rpmbuild -bb --define "build_rhel5 1" /amanda.spec
or for RHEL4,
rpmbuild -bb --define "build_rhel4 1" /amanda.spec

Saturday, March 15, 2008

Using 'Alternatives' in Linux to use a different Java package

Installing Sun Java alongside the default GNU java using the 'alternatives' system.
This post shows how to install Sun's java implementation alongside the Linux default GNU java.

Installing Sun Java alongside the default GNU java

Sun's java isn't installed by default on RedHat systems. This is because Sun hasn't licensed it for RedHat's distribution. Instead, Linux ships with an open source alternative, GNU Java. It's based on Sun's Java implementation, and--in part because of that--it's always a version or two behind Sun. In all, it's a very good implementation, but sometimes--as in the case with DSpace--it's necessary to use Sun's Java, instead.
We don't want to remove the Gnu Java; we'll install Sun's alongside it.

Thursday, March 13, 2008

Using SSL with a Wildcard Certificate on Multiple Apache Sites

It is possible to set up multiple virtual SSL-encrypted hosts (sites) in apache, but did you know it's possible for them all to use port 443 and the same IP address? Wildcard certificates help make it happen.
Setting up SSL virtual hosts in linux (specifically RHEL and CentOS, but the steps are similar in other distros) isn't hard, and--to correct a common misperception--it is possible to have multiple SSL virtual hosts running under apache using host headers. To be clear: you don't have to use separate IP addresses or different port numbers in order to have multiple SSL sites under apache.
In short, the process involves creating multiple SSL virtual hosts, each with its own host header (ServerName in apache parlance), and adding the same wildcard SSL certificate to each of the sites. There are a variety of ways to create a certificate, and you can see many of them discussed with a simple Google search. In our case, we'll use genkey from crypto-utils. Feel free to use any utility you'd like

Wednesday, March 12, 2008

Multiple SSL Sites on a Single IIS Server Using Host Headers

Wildcard SSL certificates can allow you to publish multiple IIS web sites--all using SSL on port 443--that are accessible by host headers. That is, if you're running on IIS 6 or above.


So you read about these things, wildcard certificates, but mostly you read about how to buy them. It is possible (and easy) to create one for yourself, however, so long as you don't mind it not being trusted by folks' browsers. There are some really good uses for these, not least in a test environment in which you don't care about the trust. 
Production environments need them, too, sometimes, such as when you're using a network appliance like a Netscaler or F5 load balancer. Those devices allow you to point multiple URLs (cnames, really) to a single (or multiple) server(s). Very handy.
In our case, we have several web sites that we'd like to secure using SSL. Problem is: they're all on a single server. There are several options for dealing with such a case: assign multiple IP addresses to the server, use different SSL ports for each IIS site, or (definitely the coolest option) use a wildcard certificate on the server to allow IIS to decipher the http host header. This option, by the way, is a new feature with IIS 6, so if there's anyone out there still using IIS v5, this is another reason to upgrade.

Tuesday, March 11, 2008

LDAP Authentication in Mediawiki

LDAP Authentication in Mediawiki isn't terribly hard, and it's so very worth it. This post shows how one implementation succeeded, and hopefully it'll help with yours. I have to say that I'm a little hesitant to post this entry, as many people have done so, and inevitably, the post becomes dated, full of deprecated and even downright wrong information. So one runs the risk in the end of being more of a hindrance than a help. So: caveat emptor. I decided in the end to write this because it took a very long time to implement this very useful extension to MediaWiki, and I hope my process will help others in their own implementation. Having said that, one really should check out all of the work Ryan Lane has done and continues to do in writing and supporting this excellent extension. The main page for the extension can be found here. These instructions were written as we implemented version 1.1g, which is one release behind the (as of this writing) current version of 1.2a. Having got that behind us, I hope this is helpful to you:

LDAP Authentication

This is a big one. It can be got from the MediaWiki Extensions Site. The instructions are pretty tough to follow, but it does work.
Here are our settings in LocalSettings.php, in which the user is authenticated against the domain, and all users except those in a select group are disallowed from logging in.

A note about SSL encryption

SSL encryption is necessary to ensure this is a secure process. Especially given that we're talking about domain usernames and passwords. So first, make sure that the apache server is requiring https when accessing the wiki. Second, for the SSL piece of the LDAP authentication to work, the wiki server has to recognize and trust the root CA of the LDAP server (or, in our case, the LDAP virtual IP fronted by a netscaler device). I hope to have instructions on doing this piece posted soon. In any case, please do this before going further.

LocalSettings.php Contents

#LDAP authentication require_once( "$IP/extensions/LdapAuthentication.php" );
#$wgLDAPDebug = 6;
$wgAuth = new LdapAuthenticationPlugin();
$wgLDAPDomainNames = array( "DOMAINNAME");
$wgLDAPServerNames = array( "DOMAINNAME"=>"ldapserver.FQDN" );
$wgLDAPSearchStrings = array( "domainname"=>"DOMAINNAME\\USER-NAME" );
$wgLDAPEncryptionType = array( "domainname"=>"ssl" );
$wgLDAPUseLocal = false;
$wgMinimalPasswordLength = 1;
$wgLDAPBaseDNs = array( "domainname"=>"dc=tcu,dc=edu" );
$wgLDAPSearchAttributes = array( "domainname"=>"sAMAccountName" );
 #Everything above is for simple LDAP authentication; the stuff below is for group syncronization
#DNs in $wgLDAPRequiredGroups must be lowercase, as search result attribute values are...
$wgLDAPRequiredGroups = array( "domainname"=>array("Fully qualified LDAP cn structure goes here") );
$wgLDAPGroupUseFullDN = array( "domainname"=>true );
$wgLDAPLowerCaseUsername = array( "domainname"=>true, );
$wgLDAPGroupObjectclass = array( "domainname"=>"group" );
$wgLDAPGroupAttribute = array( "domainname"=>"member" );
$wgLDAPGroupSearchNestedGroups = array( "domainname"=>true );
$wgLDAPUseLDAPGroups = array( "domainname"=>"true" );
$wgLDAPGroupNameAttribute = array( "domainname"=>"cn" );
 #Adding new groups to the list of possible groups. This value (the group name)
#also needs to be added to the user_groups table in the database. That happens manually.
$wgGroupPermissions['groupname']['edit']= true;

The first bit should be pretty self-explanatory: load the extension, then set the basic variables as specific to your environment. In the examples here, I have used "domainname" and "DOMAINNAME" instead of our true domain name. Case matters here, so stay sharp! Note that the $wgLDAPBaseDNs variable is important; it must be correct. In most cases, this is the final bit of your domain name. For instance, if my domain is example.com, my base DN is also example.com.
Likewise, $wgLDAPRequiredGroups is very specific, and if it's not just right, the whole thing will break. Note that ldapsearch--a piece of openssl--can be an extremely useful tool in determining the correct settings for all of this. If you're using linux, you very likely already will have this tool. If you're using Windows, dsget is an equivalent (as a part of Windows Server) that can really help you out of a jam. Many will recommend a web-base ldap browser, but, honestly, I think the command-line tools like ldapsearch and dsget are much easier to use and set up.
If you're having difficulty, uncomment the $wgLDAPDebug line, and it'll provide a lot of useful debugging information within the browser session.

User Rights Management

User rights management is done through groups. We use the domain groups for this purpose, but it's also necessary to tell MediaWiki about the groups, and how we'll use them. This is done in a single step:
Defining group rights
Edit the LocalSettings.php file and add lines as below:
## The following three lines disable anonymous access $wgGroupPermissions['*' ]['createaccount'] = false;
$wgGroupPermissions['*' ]['read'] = false;
$wgGroupPermissions['*' ]['edit'] = false;
$wgGroupPermissions['tcudba']['edit'] = true;
$wgGroupPermissions['user' ]['move'] = false;
$wgGroupPermissions['user' ]['read'] = true;
$wgGroupPermissions['user' ]['edit'] = false;
$wgGroupPermissions['user' ]['upload'] = false;
In the above example, the default group (user) only can read articles. Those who have not authenticated (*) cannot do anything in the wiki. Those in TCUDBA can edit documents.
There are a variety of possible permissions, which are detailed here. The table below shows a few of the more relevant permissions:
Permission Description
read allows viewing pages not defined in $wgWhitelistRead
edit allows editing unprotected pages.
createpage allows the creation of new pages (requires the edit right).
move allows renaming page titles.
upload allows the creation of new images and files.
createaccount allows the creation of new user accounts.
delete allows the deletion of edits and pages.

Modifying User Groups

An easy way to modify the Mediawiki database is to use PHPmyAdmin. Of course, whether you use a GUI or the command line, the data to modify is the same.
After logging in to phpmyadmin, select the WIKIDB database on the left. Then select the user_groups table and click on the browse button. You'll see the userid and group name of all the users. Note that the userid is a number; you have to use the users table to find out which userid corresponds to which username. Use this method to get back as a sysop in the wiki if you've accidentally removed yourself from that group. If you're still a sysop, you simply can use the special:userrights page.

Troubleshooting

If you receive the error basedn is not set for this type of entry, trying to get the default basedn, that means that the $wgLDAPBaseDNs variable isn't set correctly. At the time of this writing, the correct value for that is
$wgLDAPBaseDNs = array( "tcu"=>"dc=tcu,dc=edu" );
The following commands also can be helpful in determining if your system is set up correctly:
ldapsearch -x -D @TCU -W -b "dc=tcu,dc=edu" "sAMAccountName=" -H ldaps://ldap.example.com
openssl s_client -connect ldap.example.com:636

Manually Adding a User to a Group in Mediawiki

If you've locked yourself out of MediaWiki administration, say, by implementing LDAP authentication, this shows you how to add a user to MediaWiki groups by editing the security tables in the database. User rights are stored in a MySQL table called user_groups. Usually you'll find it's got the wiki prefix so to give a user with the user_id of 1 bureaucrat privileges in the system wiki, use the command:
insert into user_groups values(1,'bureaucrat');

The other 'power' group is sysop:

insert into user_groups values(1,'sysop');

To find out which user_id you want to use, execute the following:

select * from user
Note that you'll need to prefix the table names with a prefix, if you set up your wiki to use one.

Copying SQL Server 2005 logins from one instance to another

Copying SQL Server 2005 logins from one instance to another can be scripted pretty easily with these stored procedures from Microsoft. This is a reasonably easy task, and it's outlined in Microsoft KB article 918992. Here's the gist, if you want to get down to brass tacks quickly. Create the stored procedures sp_hexadecimal and sp_help_revlogin:
USE master GO IF OBJECT_ID ('sp_hexadecimal') IS NOT NULL DROP PROCEDURE sp_hexadecimal GO CREATE PROCEDURE sp_hexadecimal @binvalue varbinary(256), @hexvalue varchar (514) OUTPUT AS DECLARE @charvalue varchar (514) DECLARE @i int DECLARE @length int DECLARE @hexstring char(16) SELECT @charvalue = '0x' SELECT @i = 1 SELECT @length = DATALENGTH (@binvalue) SELECT @hexstring = '0123456789ABCDEF' WHILE (@i <= @length) BEGIN DECLARE @tempint int DECLARE @firstint int DECLARE @secondint int SELECT @tempint = CONVERT(int, SUBSTRING(@binvalue,@i,1)) SELECT @firstint = FLOOR(@tempint/16) SELECT @secondint = @tempint - (@firstint*16) SELECT @charvalue = @charvalue + SUBSTRING(@hexstring, @firstint+1, 1) + SUBSTRING(@hexstring, @secondint+1, 1) SELECT @i = @i + 1 END SELECT @hexvalue = @charvalue GO IF OBJECT_ID ('sp_help_revlogin') IS NOT NULL DROP PROCEDURE sp_help_revlogin GO CREATE PROCEDURE sp_help_revlogin @login_name sysname = NULL AS DECLARE @name sysname DECLARE @type varchar (1) DECLARE @hasaccess int DECLARE @denylogin int DECLARE @is_disabled int DECLARE @PWD_varbinary varbinary (256) DECLARE @PWD_string varchar (514) DECLARE @SID_varbinary varbinary (85) DECLARE @SID_string varchar (514) DECLARE @tmpstr varchar (1024) DECLARE @is_policy_checked varchar (3) DECLARE @is_expiration_checked varchar (3) DECLARE @defaultdb sysname IF (@login_name IS NULL) DECLARE login_curs CURSOR FOR SELECT p.sid, p.name, p.type, p.is_disabled, p.default_database_name, l.hasaccess, l.denylogin FROM sys.server_principals p LEFT JOIN sys.syslogins l ON ( l.name = p.name ) WHERE p.type IN ( 'S', 'G', 'U' ) AND p.name <> 'sa' ELSE DECLARE login_curs CURSOR FOR SELECT p.sid, p.name, p.type, p.is_disabled, p.default_database_name, l.hasaccess, l.denylogin FROM sys.server_principals p LEFT JOIN sys.syslogins l ON ( l.name = p.name ) WHERE p.type IN ( 'S', 'G', 'U' ) AND p.name = @login_name OPEN login_curs FETCH NEXT FROM login_curs INTO @SID_varbinary, @name, @type, @is_disabled, @defaultdb, @hasaccess, @denylogin IF (@@fetch_status = -1) BEGIN PRINT 'No login(s) found.' CLOSE login_curs DEALLOCATE login_curs RETURN -1 END SET @tmpstr = '/* sp_help_revlogin script ' PRINT @tmpstr SET @tmpstr = '** Generated ' + CONVERT (varchar, GETDATE()) + ' on ' + @@SERVERNAME + ' */' PRINT @tmpstr PRINT '' WHILE (@@fetch_status <> -1) BEGIN IF (@@fetch_status <> -2) BEGIN PRINT '' SET @tmpstr = '-- Login: ' + @name PRINT @tmpstr IF (@type IN ( 'G', 'U')) BEGIN -- NT authenticated account/group SET @tmpstr = 'CREATE LOGIN ' + QUOTENAME( @name ) + ' FROM WINDOWS WITH DEFAULT_DATABASE = [' + @defaultdb + ']' END ELSE BEGIN -- SQL Server authentication -- obtain password and sid SET @PWD_varbinary = CAST( LOGINPROPERTY( @name, 'PasswordHash' ) AS varbinary (256) ) EXEC sp_hexadecimal @PWD_varbinary, @PWD_string OUT EXEC sp_hexadecimal @SID_varbinary,@SID_string OUT -- obtain password policy state SELECT @is_policy_checked = CASE is_policy_checked WHEN 1 THEN 'ON' WHEN 0 THEN 'OFF' ELSE NULL END FROM sys.sql_logins WHERE name = @name SELECT @is_expiration_checked = CASE is_expiration_checked WHEN 1 THEN 'ON' WHEN 0 THEN 'OFF' ELSE NULL END FROM sys.sql_logins WHERE name = @name SET @tmpstr = 'CREATE LOGIN ' + QUOTENAME( @name ) + ' WITH PASSWORD = ' + @PWD_string + ' HASHED, SID = ' + @SID_string + ', DEFAULT_DATABASE = [' + @defaultdb + ']' IF ( @is_policy_checked IS NOT NULL ) BEGIN SET @tmpstr = @tmpstr + ', CHECK_POLICY = ' + @is_policy_checked END IF ( @is_expiration_checked IS NOT NULL ) BEGIN SET @tmpstr = @tmpstr + ', CHECK_EXPIRATION = ' + @is_expiration_checked END END IF (@denylogin = 1) BEGIN -- login is denied access SET @tmpstr = @tmpstr + '; DENY CONNECT SQL TO ' + QUOTENAME( @name ) END ELSE IF (@hasaccess = 0) BEGIN -- login exists but does not have access SET @tmpstr = @tmpstr + '; REVOKE CONNECT SQL TO ' + QUOTENAME( @name ) END IF (@is_disabled = 1) BEGIN -- login is disabled SET @tmpstr = @tmpstr + '; ALTER LOGIN ' + QUOTENAME( @name ) + ' DISABLE' END PRINT @tmpstr END FETCH NEXT FROM login_curs INTO @SID_varbinary, @name, @type, @is_disabled, @defaultdb, @hasaccess, @denylogin END CLOSE login_curs DEALLOCATE login_curs RETURN 0 GO
Having executed this script on the primary DB instance (in the master DB), you'll have two stored procedures, one named sp_hexadecimal, and the other named sp_help_revlogin. Execute sp_help_revlogin there in the master DB, and you'll get results like those below:
exec sp_help_revlogin; /* sp_help_revlogin script ** Generated Nov 26 2007 11:29AM on PROGGY1 */ DECLARE @pwd sysname -- Login: adm SET @pwd = CONVERT (varbinary(256), 0x0100232E814889F09515E0F88CE4DD9) EXEC master..sp_addlogin 'adm', @pwd, @sid = 0x3FF76B5AC6E7E5, @encryptopt = 'skip_encryption' -- Login: Athletics SET @pwd = CONVERT (varbinary(256), 0x010068191842A1D43B7313EEC14579B) EXEC master..sp_addlogin 'Athletics', @pwd, @sid = 0x6C5671BA, @encryptopt = 'skip_encryption' -- Login: bart SET @pwd = CONVERT (varbinary(256), 0x0100252DE7AB024B287010BD25A4AB9) EXEC master..sp_addlogin 'bart', @pwd, @sid = 0x7BEA9B86F686F, @encryptopt = 'skip_encryption' -- Login: brs SET @pwd = CONVERT (varbinary(256), 0x01007037A96AEE4A1695455AD0E9126) EXEC master..sp_addlogin 'brs', @pwd, @sid = 0x344998CB53E408, @encryptopt = 'skip_encryption'
Note that the hashed values there will be considerably longer; I've truncated them for your viewing pleasure. The output above is the script you'll run on the mirror instance to create the appropriate logins. Simply copy the whole output to your mirror instance and delete the logins from the script that you do not wish to copy. This will create the logins on your mirror instance with the same passwords (if you're using SQL authentication) as on your primary instance. You'll still have to set up the server permissions on the mirror instance as they were set up on the primary, but this makes the process a whole lot easier.

SharePoint with SQL Server Mirroring

While most documentation for implementing Microsoft SharePoint suggests using SQL Server clustering for high availability and failover, database mirroring might be as good or even a better option. If, for instance, you don't have a SAN, you might really appreciate the ability to use database mirroring instead. This post runs through using DB mirroring with SharePoint 2007. There is a ton of information out there about implementing Microsoft Office SharePoint Server 2007 (MOSS), but my experience is that the bulk of them fall into two basic categories: very basic step-by-step instructions that don't go into much detail on the why of it all, and those that focus entirely on the why without talking much, if at all, about the how. So you either end up with a theoretical understanding of the underpinnings of SharePoint (assuming you are familiar with the terminology), or you are able to set a basic MOSS site without knowing if you're following best-practices, or if what you're doing will even give you what you want. It's my hope--as we go through our implementation--to find and post a middle road through all this. By way of starting out, here are a few documents that have been helpful in implementing SharePoint.
  • Microsoft SQL Server Mirroring with SharePoint Unfortunately, this document is almost entirely instructions on how to set up database mirroring in SQL Server. If you're a DBA, this is not useful information to you, and if you're not a DBA, you're likely going to use the SQL Server GUI to implement database mirroring, anyway (the white paper gives instructions on mirroring through T-SQL commands). Happily, though, there is a bit on configuring SharePoint to use the mirror database in the event of a failover. In short: you use the SQL Alias feature (through cliconfg.exe) on the front-end web server(s). This is the method we ended up using.
Implementing DB Mirroring with SharePoint
Here's where the rubber hits the road. To be clear: we're talking SQL Server 2005, here. In short, this is what we're doing:
  • Mirror the SQL Server databases
  • Ensure the SharePoint login accounts can access the mirror DB server
  • Configure the SharePoint front-end web server(s) to allow for failover
At the moment, we're not going to go into much detail on setting up the mirroring; that may be added at another time. It's a good idea to set up a witness server (instance, really); that makes testing the failover much easier, and the witness instance can be a SQL Server Express instance, so it won't cost you any more. Do make sure your logins from the primary database instance are copied to the mirror instance. This KB article from Microsoft talks about doing so. Or you can see my summary in this post.
Setting up the Server Alias
Here's the money piece. SQL Server includes a "alias" feature that allows you to create a synonym, stored in the registry, for a SQL Server. This is important, because, for some reason, MOSS 2007 developers decided not to include SQL Server mirror failover capability in the product. <Actually, this decision probably is a function of the way SharePoint handles the database; it really does treat the SQL Server instance as a whole, rather than as several databases. Given that, it does follow that--since mirroring is a database-level (rather than instance-level) high-availability technology--SharePoint mightn't work quite right with mirroring. Still, it'd have been nice for them to have worked out a way for this to function.> To create an alias, run the application cliconfg.exe. This allows you to create an alias for a SQL Server machine, stored in the registry. It should be noted here that there may be two versions of this application if you're running this on a 64-bit server. They are identical except that the 32-bit version stores the alias in the 32-bit compatibility registry key. We've had instances in which we've had to set the alias up in both the standard (64-bit) and compatible (32-bit) keys in order to get SharePoint to use the alias fully. Note that when you create a TCP alias, the port matters. If you're not pointing the alias to a named instance, the port by default is 1433. Additional instances will always have a different port. You can find the port number either in the current SQL Server startup logs or by using the SQL Server configuration utility. The registry key in which the alias is stored is at

\\HKLM\Softare\Microsoft\MSSQLServer\Client\ConnectTo\

While the 32-bit compatible key is at

\\HKLM\Software\Wow6432Node\Microsoft\MSSQLServer\Client\ConnectTo\

A TCP Alias breaks down something like this: DBMSSOCN,servername,4984 Where DBMSSOCN refers to TCP, servername is the server name, and 4984 is the port number. A Named Pipes Alias, on the other hand: DBNMPNTW,\\servername\PIPE\MSSQL$spstg\sql\query Where DBNMPNTW refers to Named Pipes, servername is the server name, and $spstg is the instance name. Once you've got these registry keys set, it's a simple matter of changing the server name (and port, if necessary) in the alias after a failover. This will point SharePoint to the mirror DB server instead of to the primary. If you're comfortable doing this, changing the registry directly is quite sufficient. If not, you can edit the alias with the cliconfg.exe application. After changing the alias, it's prudent to go ahead and reset IIS. You can simply run the IISRESET command from the command line to do this. It should be pointed out again that, while SQL Server DB mirroring is on a database-level (that is, a single database within an instance can fail over to the mirror), SharePoint, for the most part, treats the SQL Server instance as a unit. While it's possible to use STSADM to rename a server for a particular database, this seems like more work than is necessary. To do this failover automatically requires another step, and it's one that we're still working on. I'll post that as we move closer to that goal.